To facilitate the assembly of your outdoor fireplace, refer to the plan received at the purchase of your fireplace and to the assembly's general section for more advices.
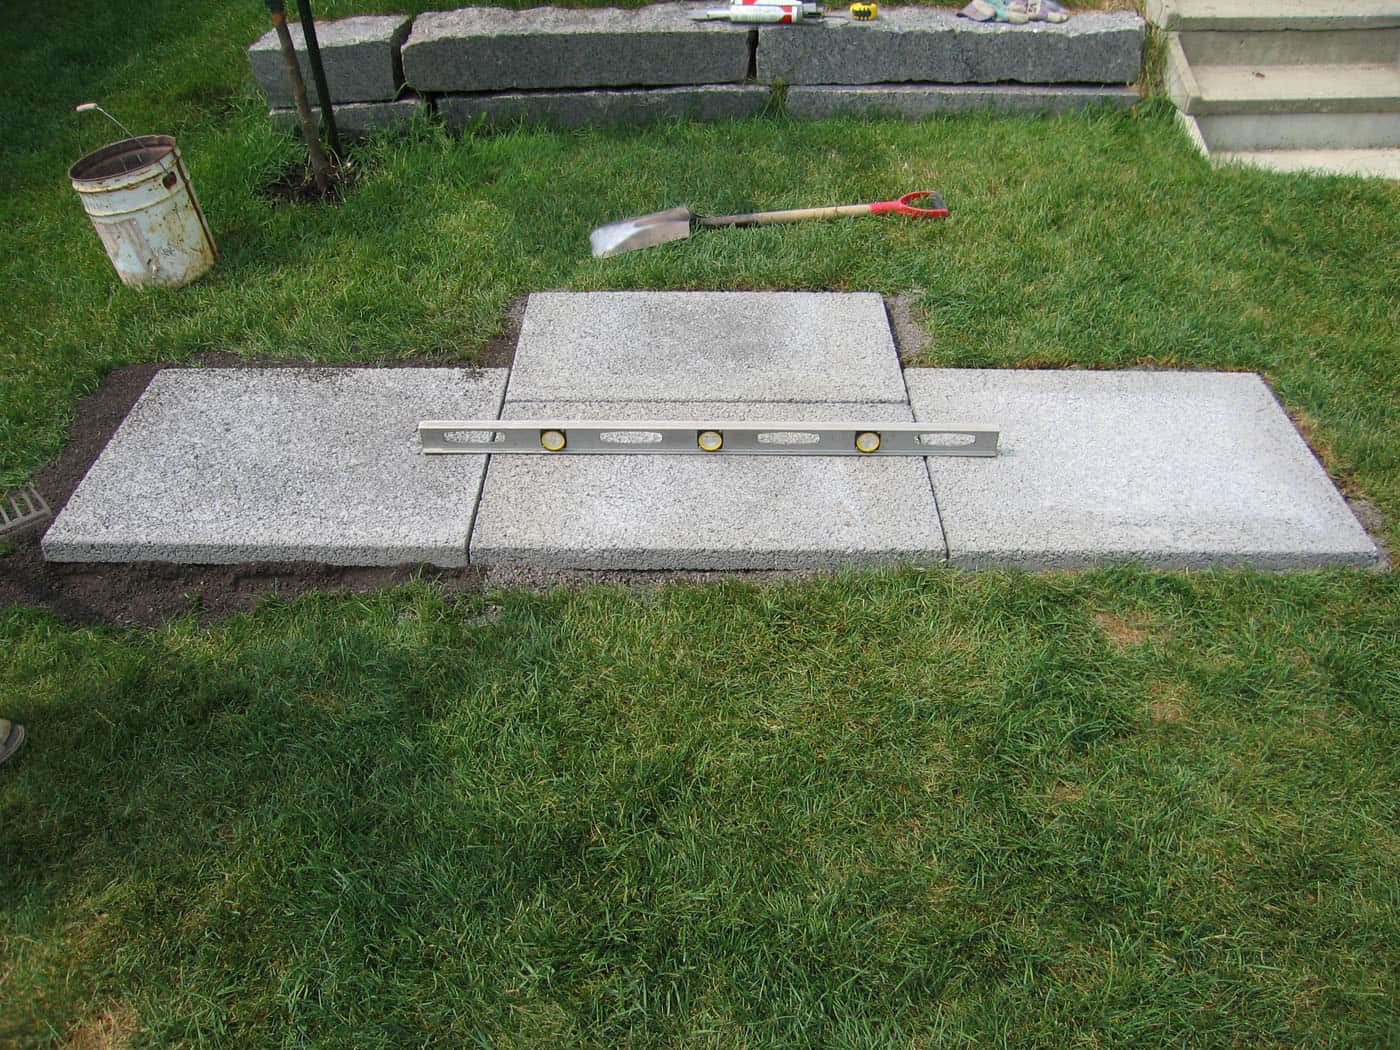
Place from left to right the the first Start 26”, an Half-Block 26”, a Start 3 Notches 42”, an Half-Block 26”, the other Start 3 Notches 42”, the last Half-Block 26” and the second Start 26”.
Place the 2 blocks Start 26” in line with the back of the tile (boxes for wood section).
Place the others blocs so that the mortise can receive the subsequent blocks. Tip : Mesure the distance at the front of the blocks and keep the same for the other Start blocks. Reminder : The flat side of each block goes inside the fireplace.
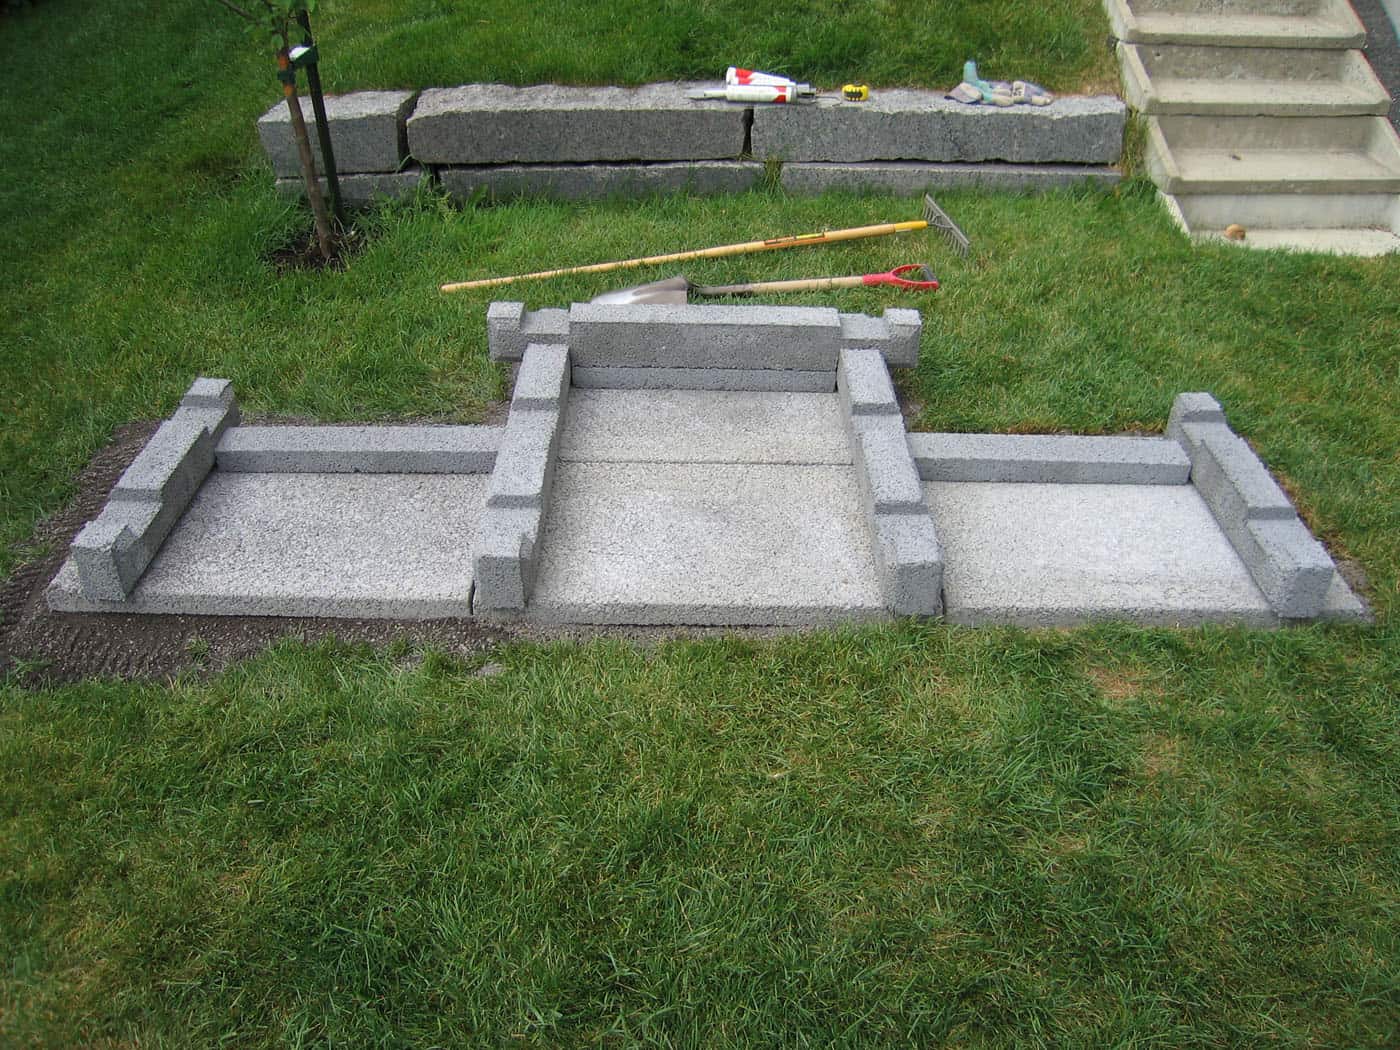
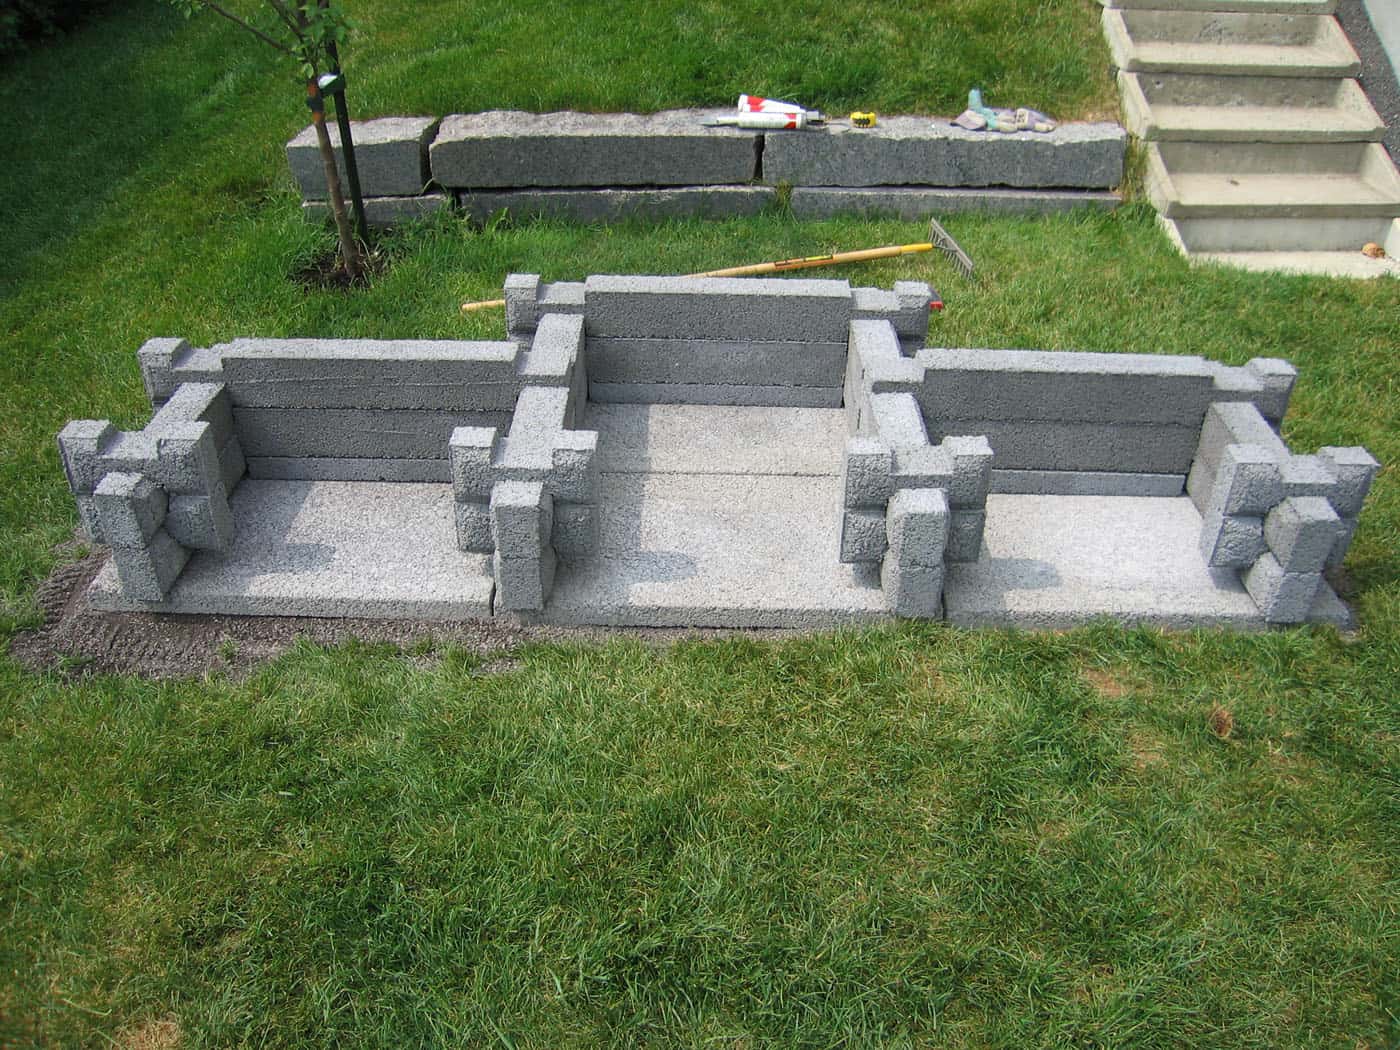
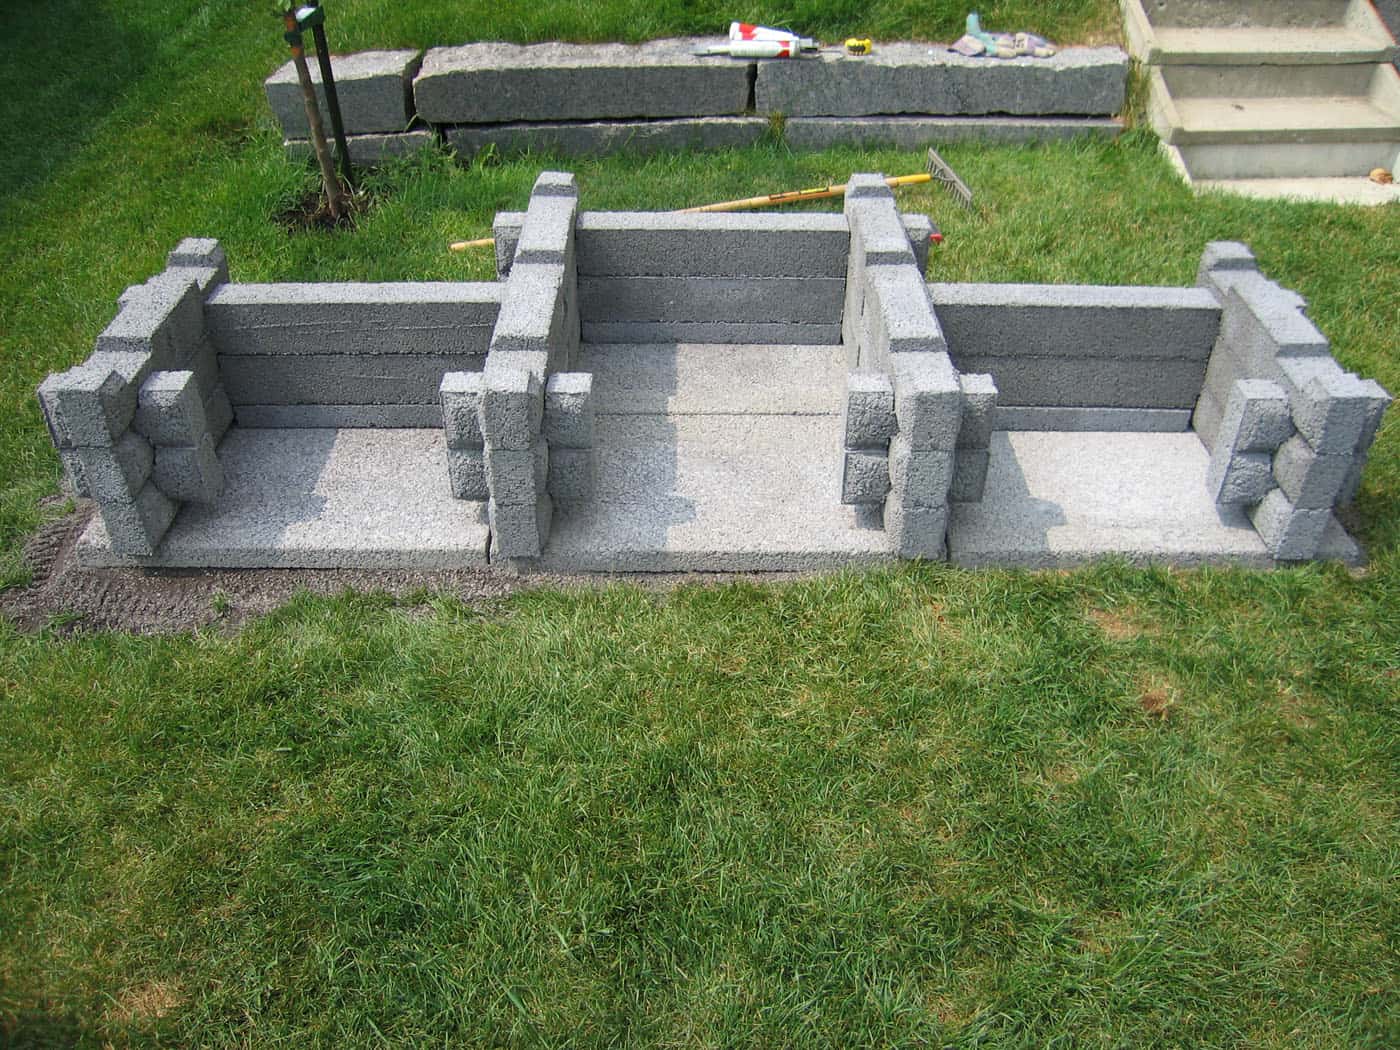
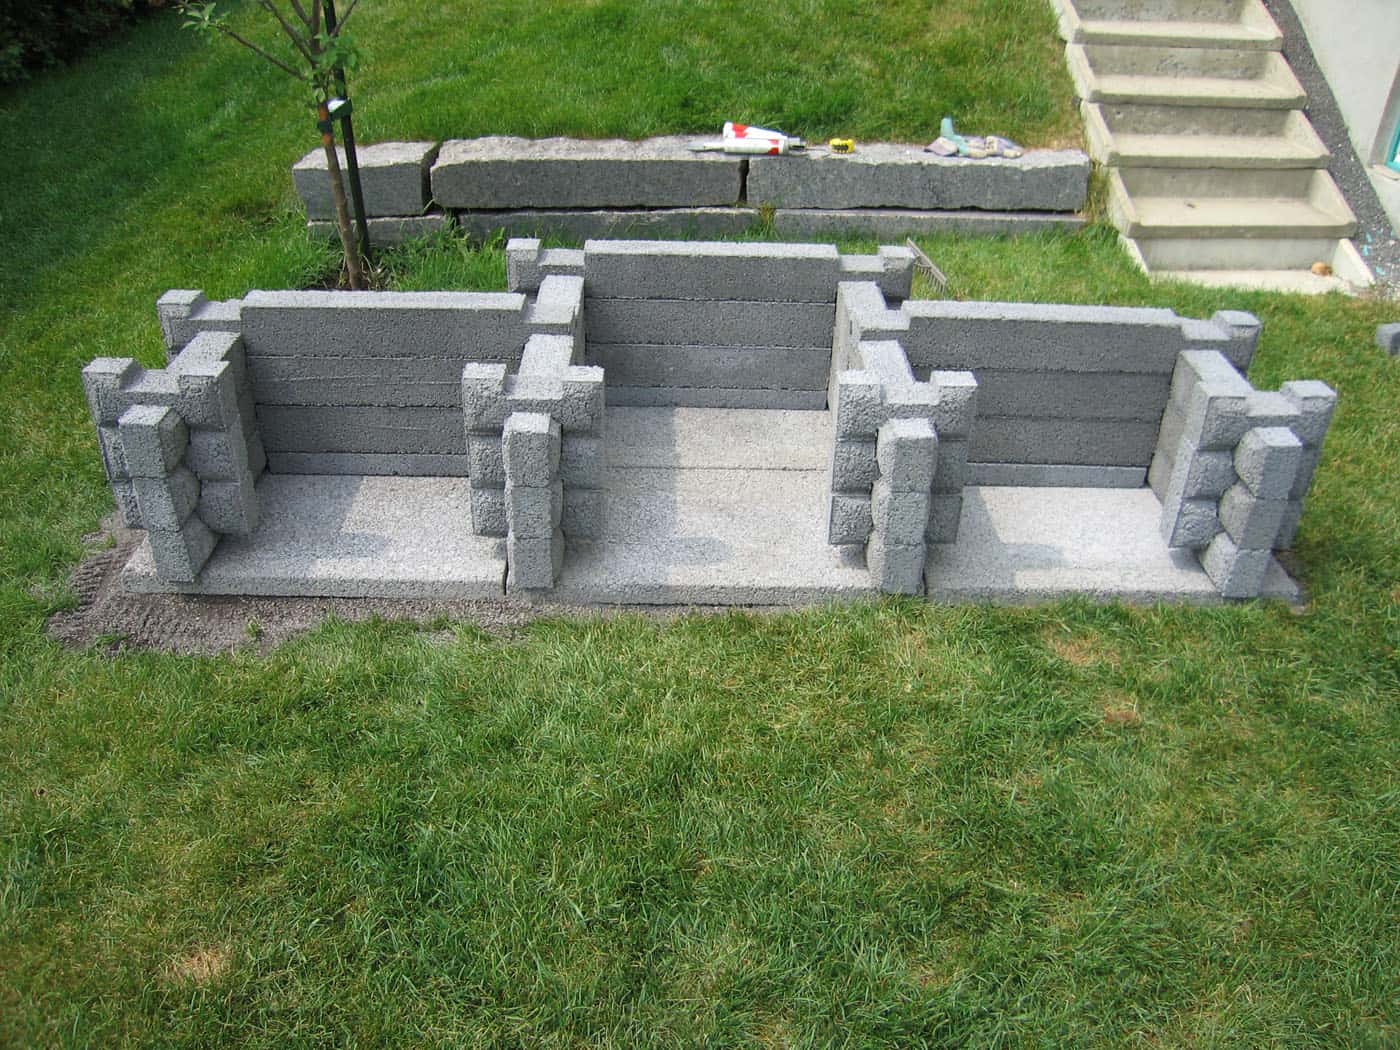
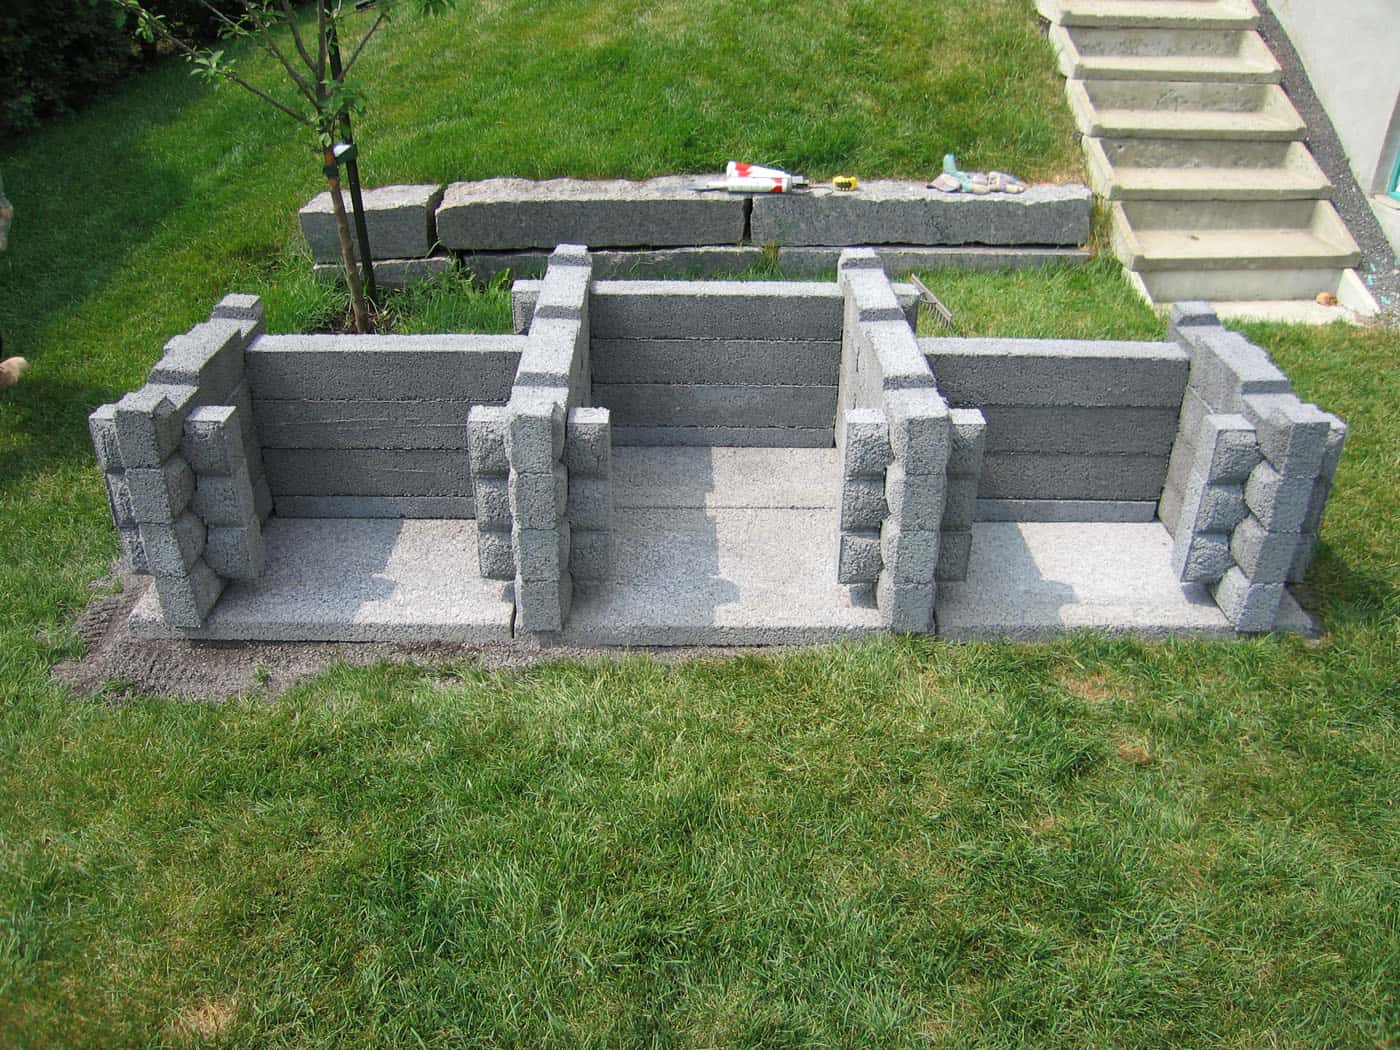
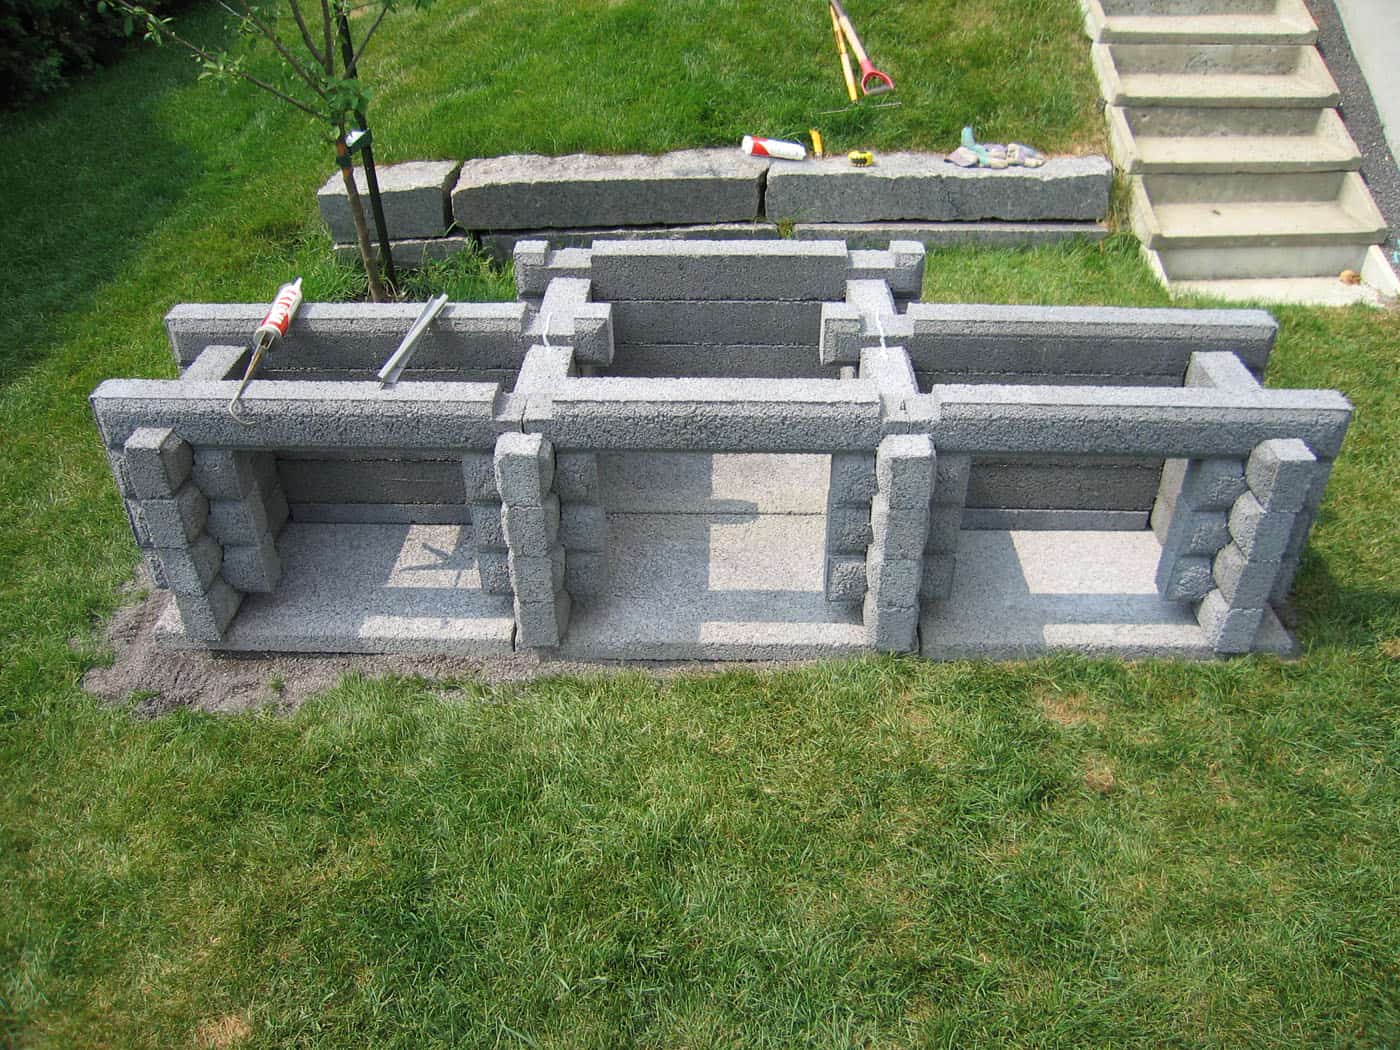
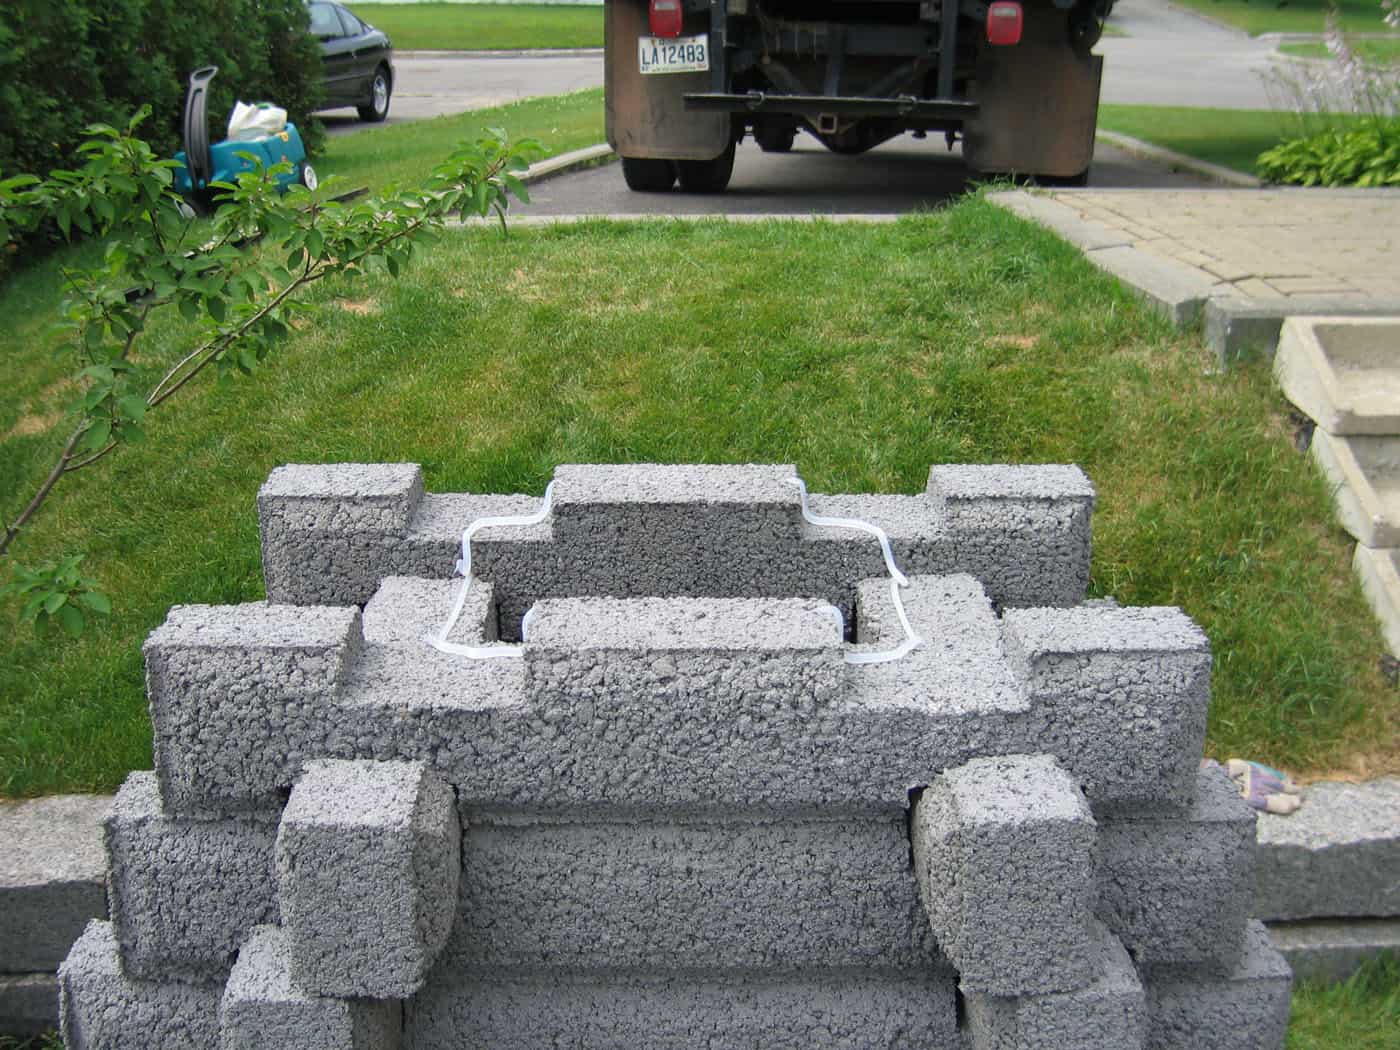
Place 4 little blocks of 12” at the front, a 42” (4 notches) at the back of the hearth of the fireplace and the 2 Beaver 39” to form the back of the boxes for wood.
Place a block of 26” (4 notches) at the left, a block 6 Notches 42” at the left and at the right of the hearth and another 26” (4 notches) at the right.
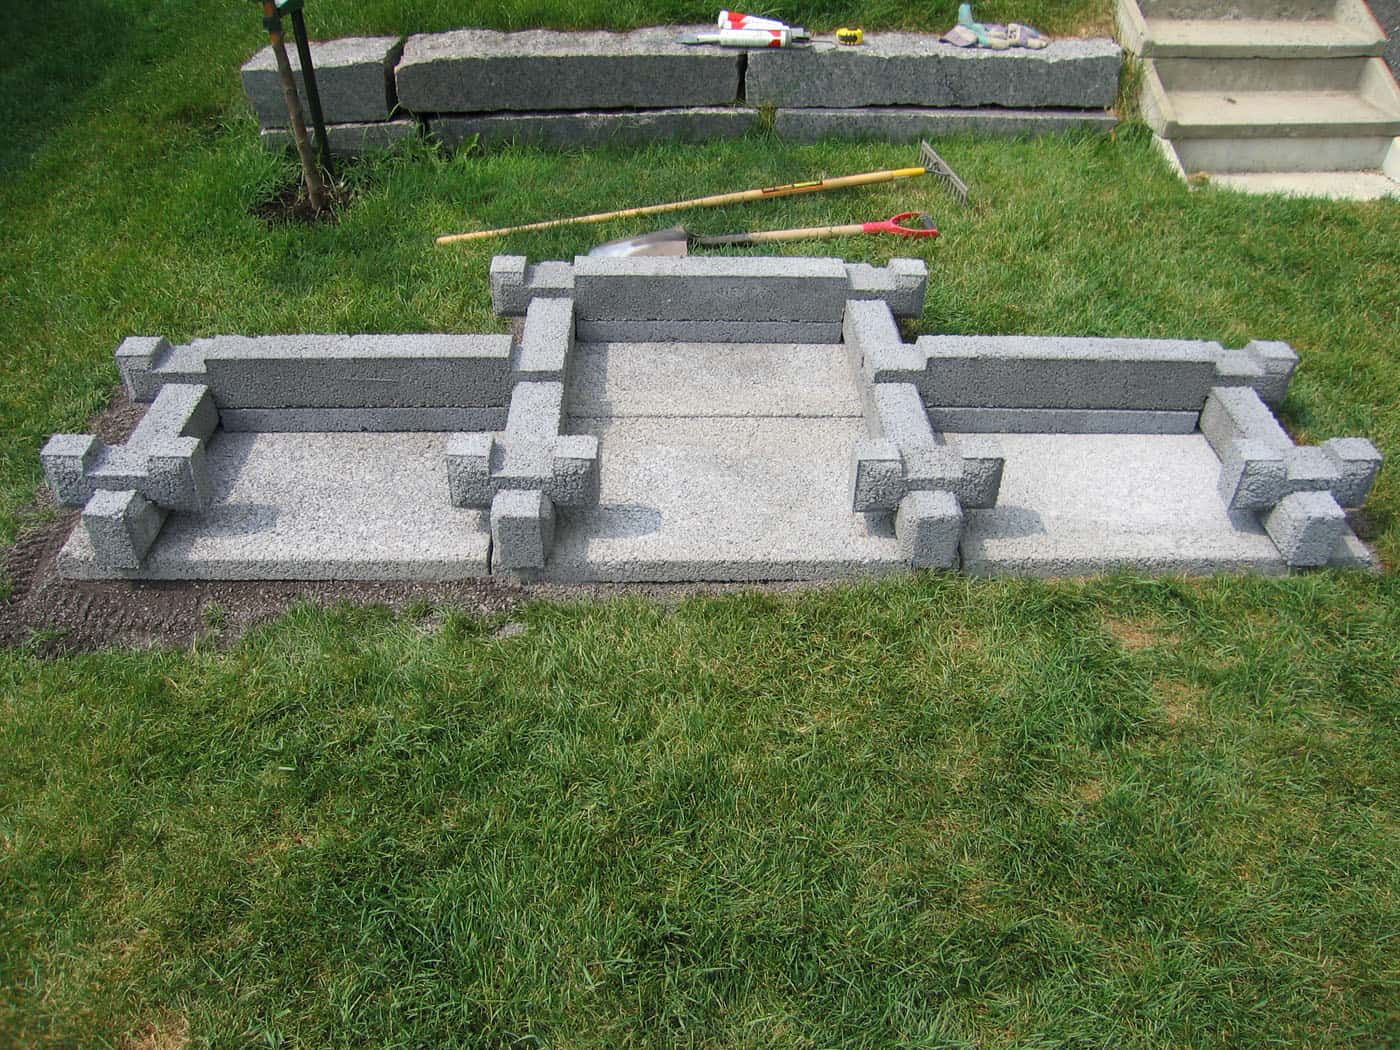
Place 4 little blocks of 12” at the front, a 42” (4 notches) at the back of the hearth
of the fireplace and the 2 Beaver 39”.
Place a block of 26” (4 notches) at the left, a block 6 Notches 42” at the left and at the right of the hearth and another 26” (4 notches) at the right.
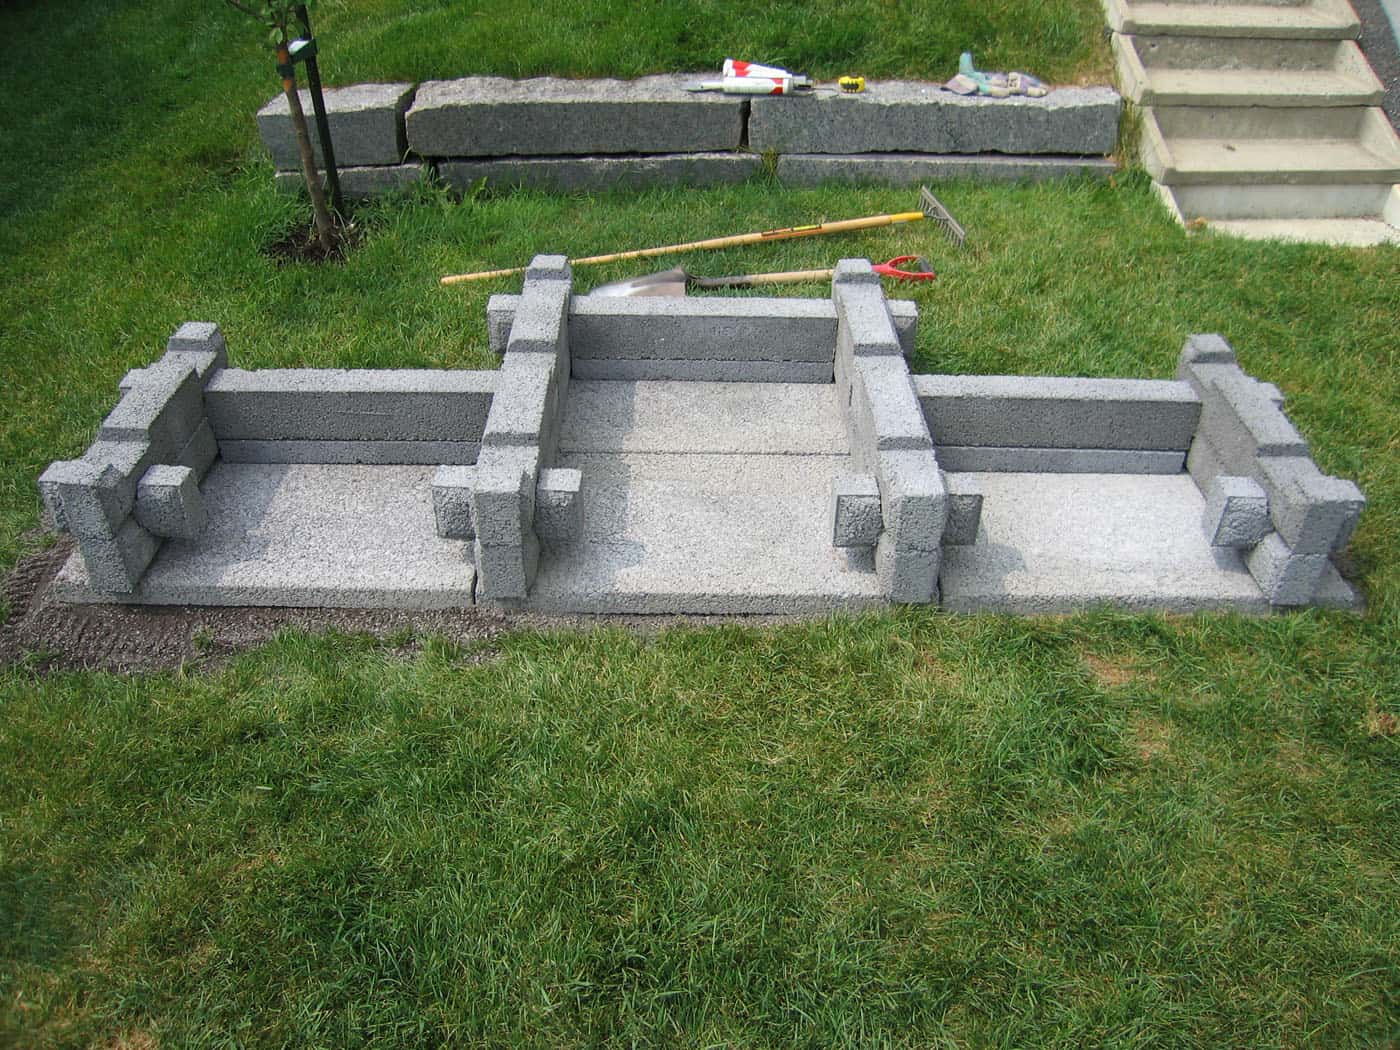
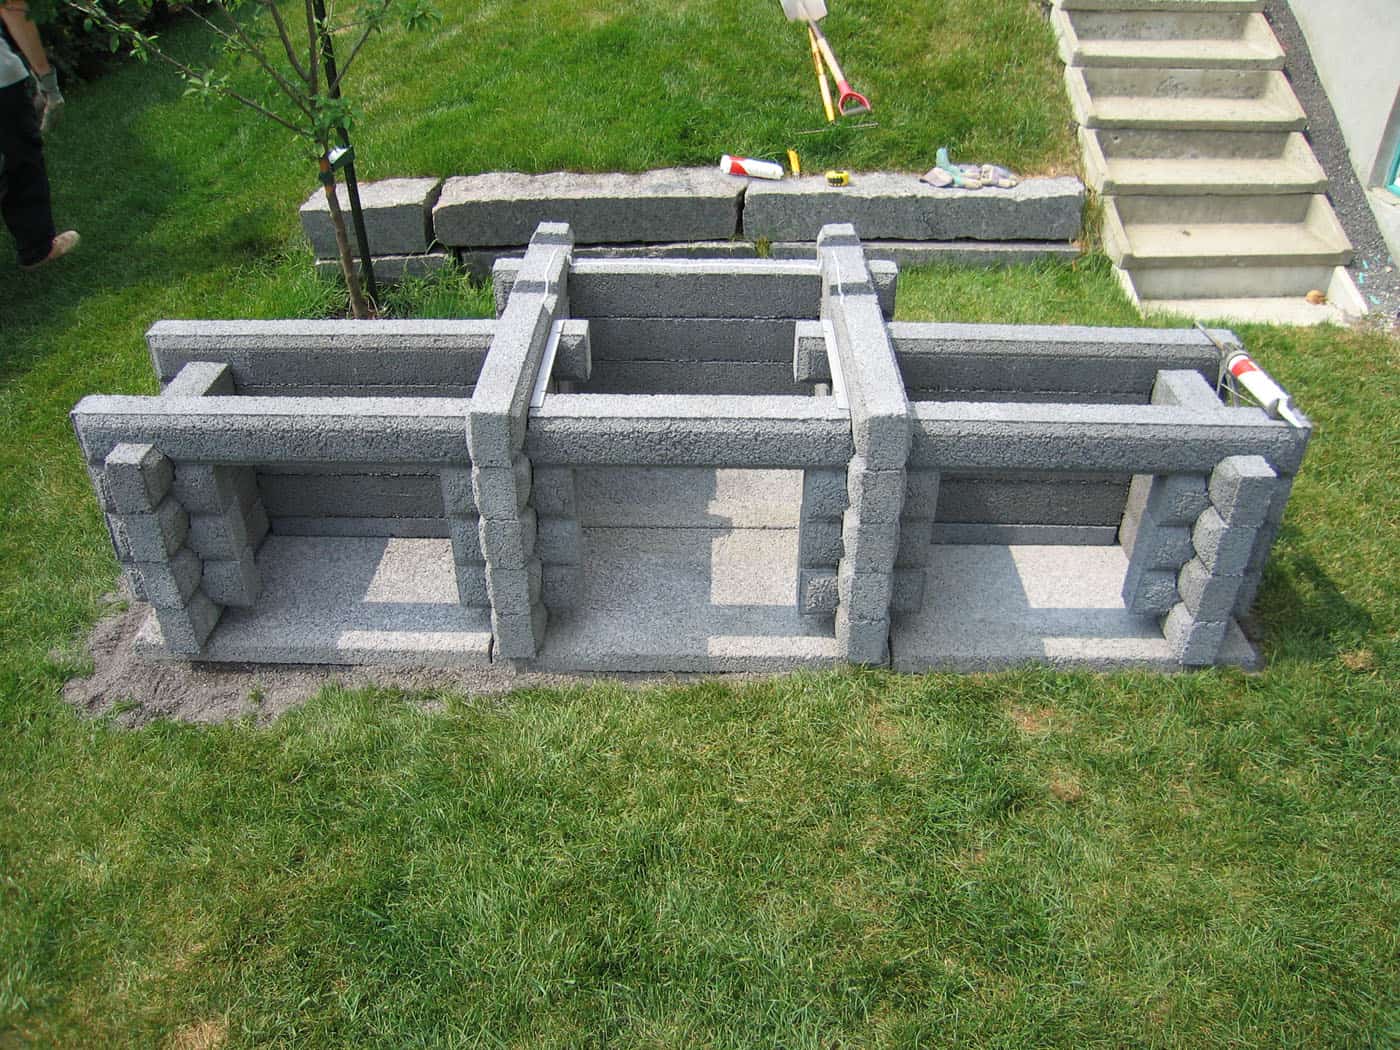
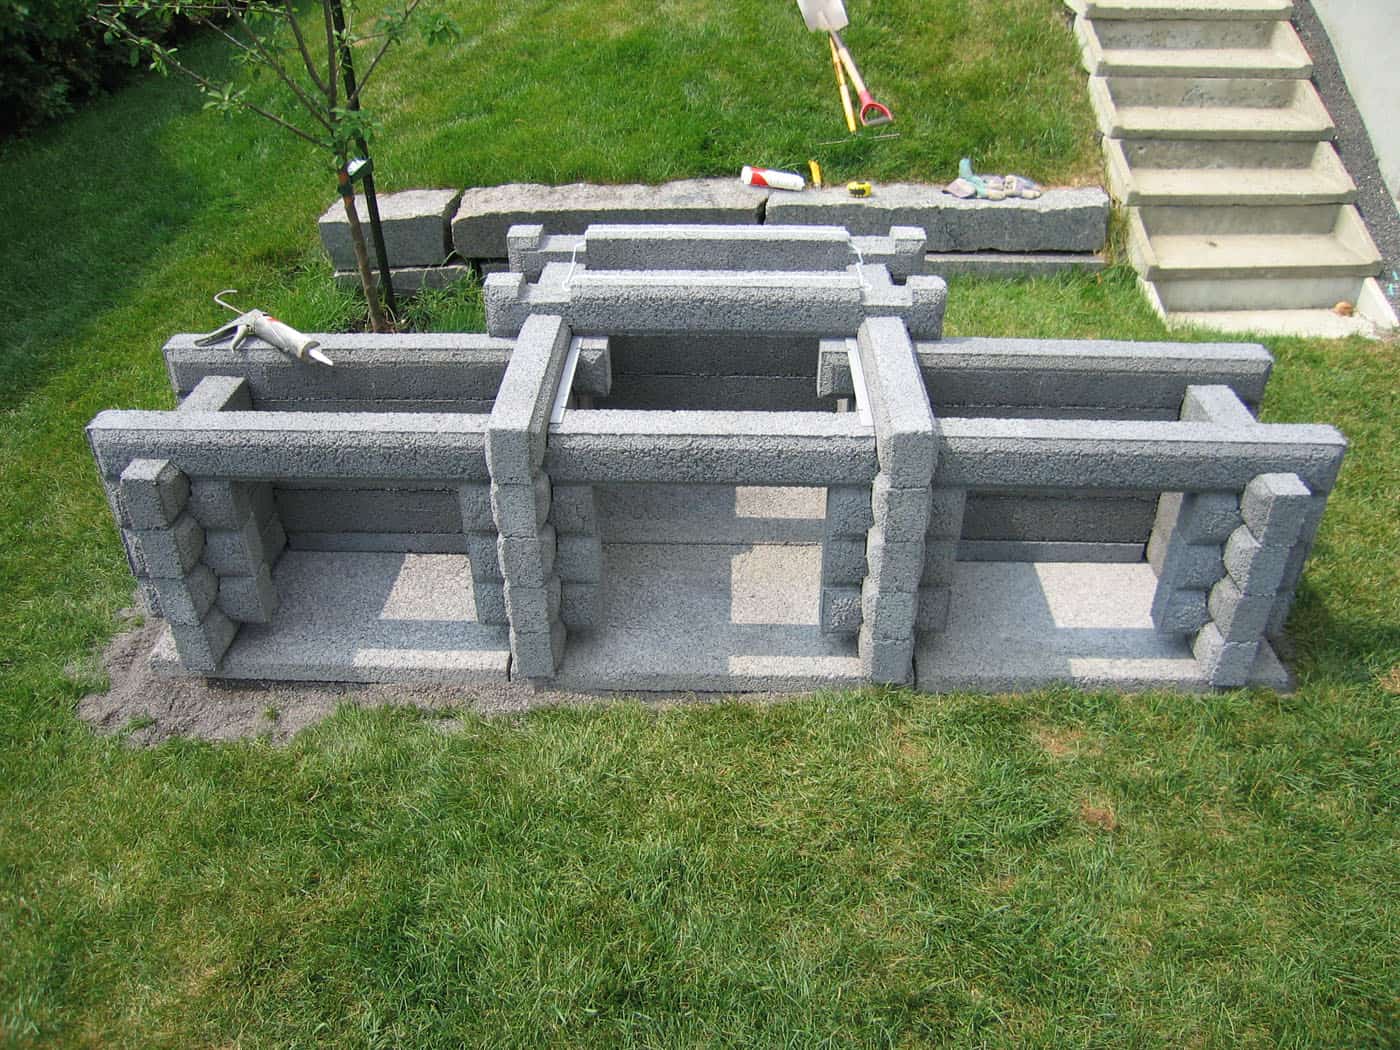
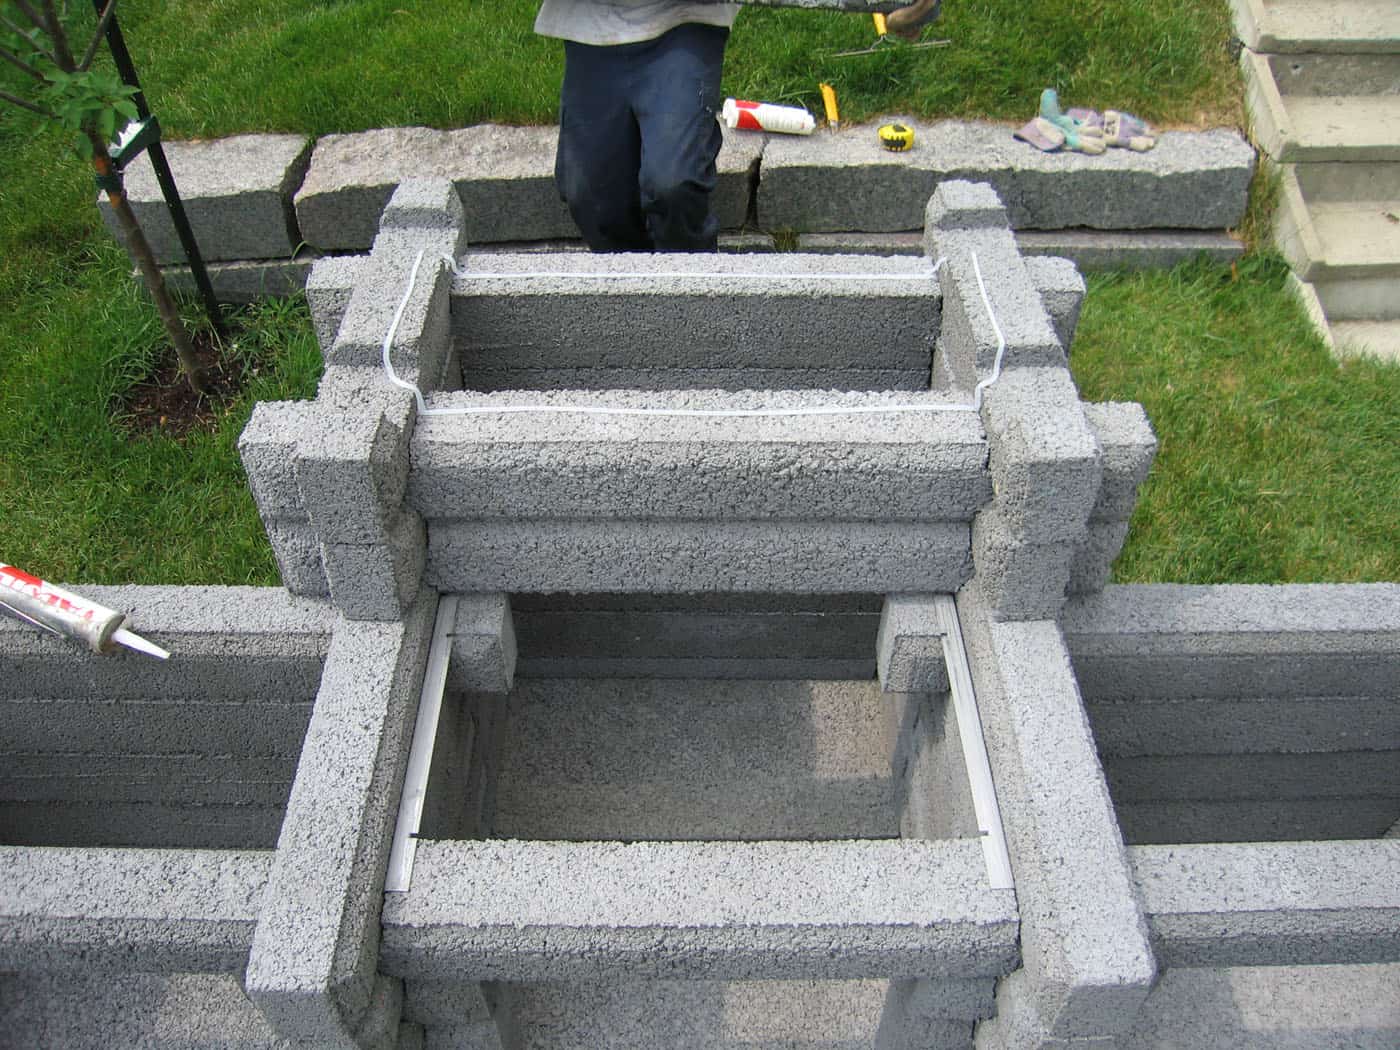
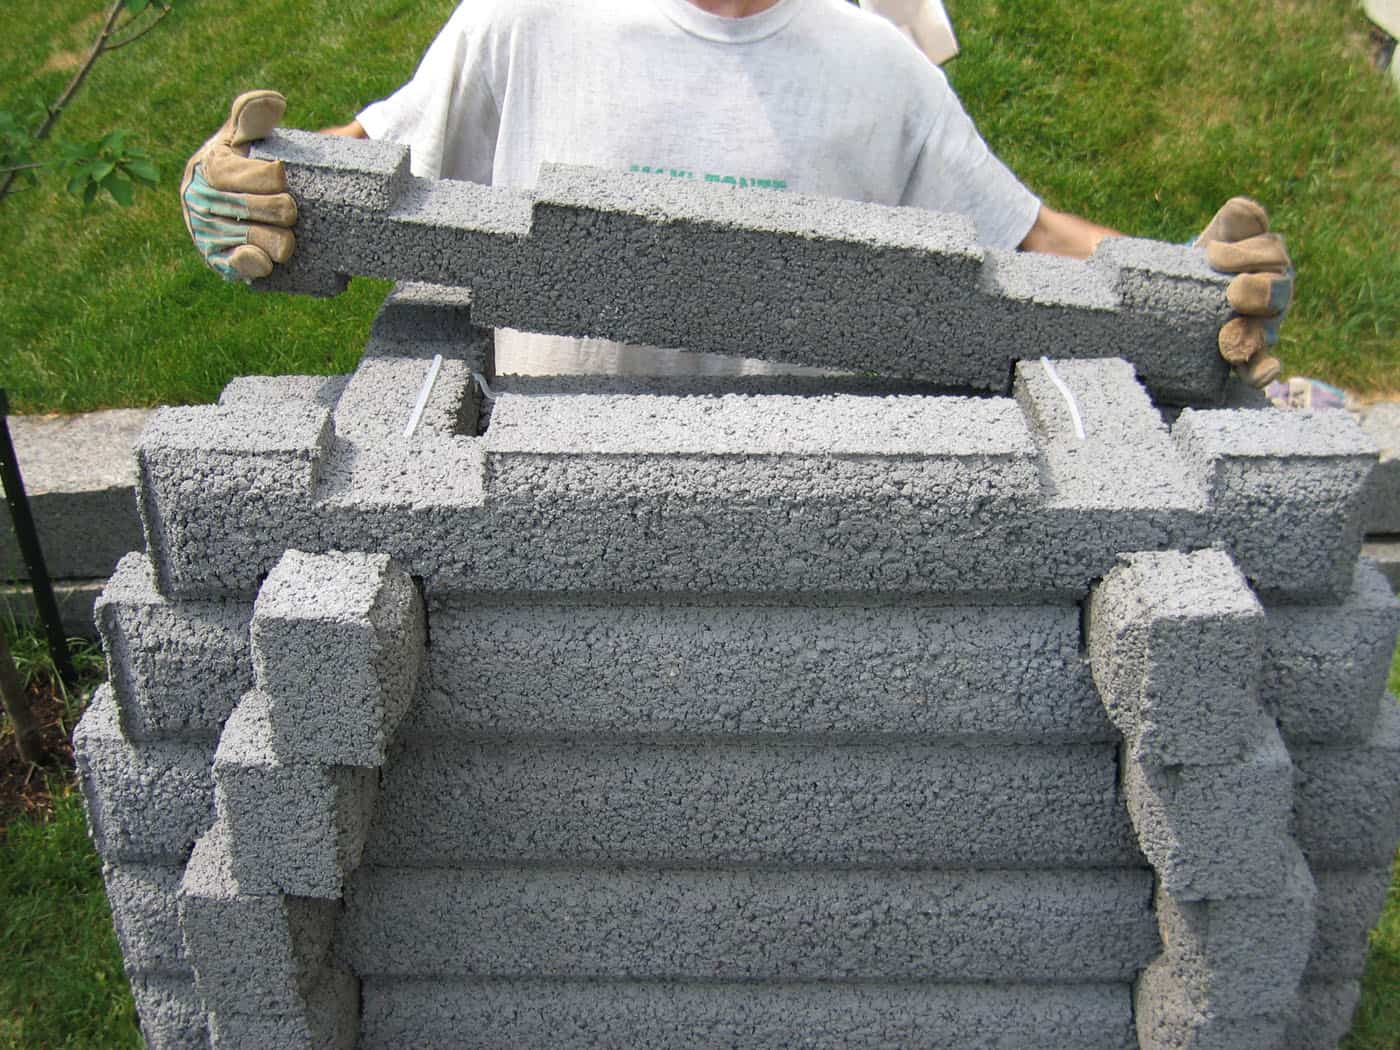
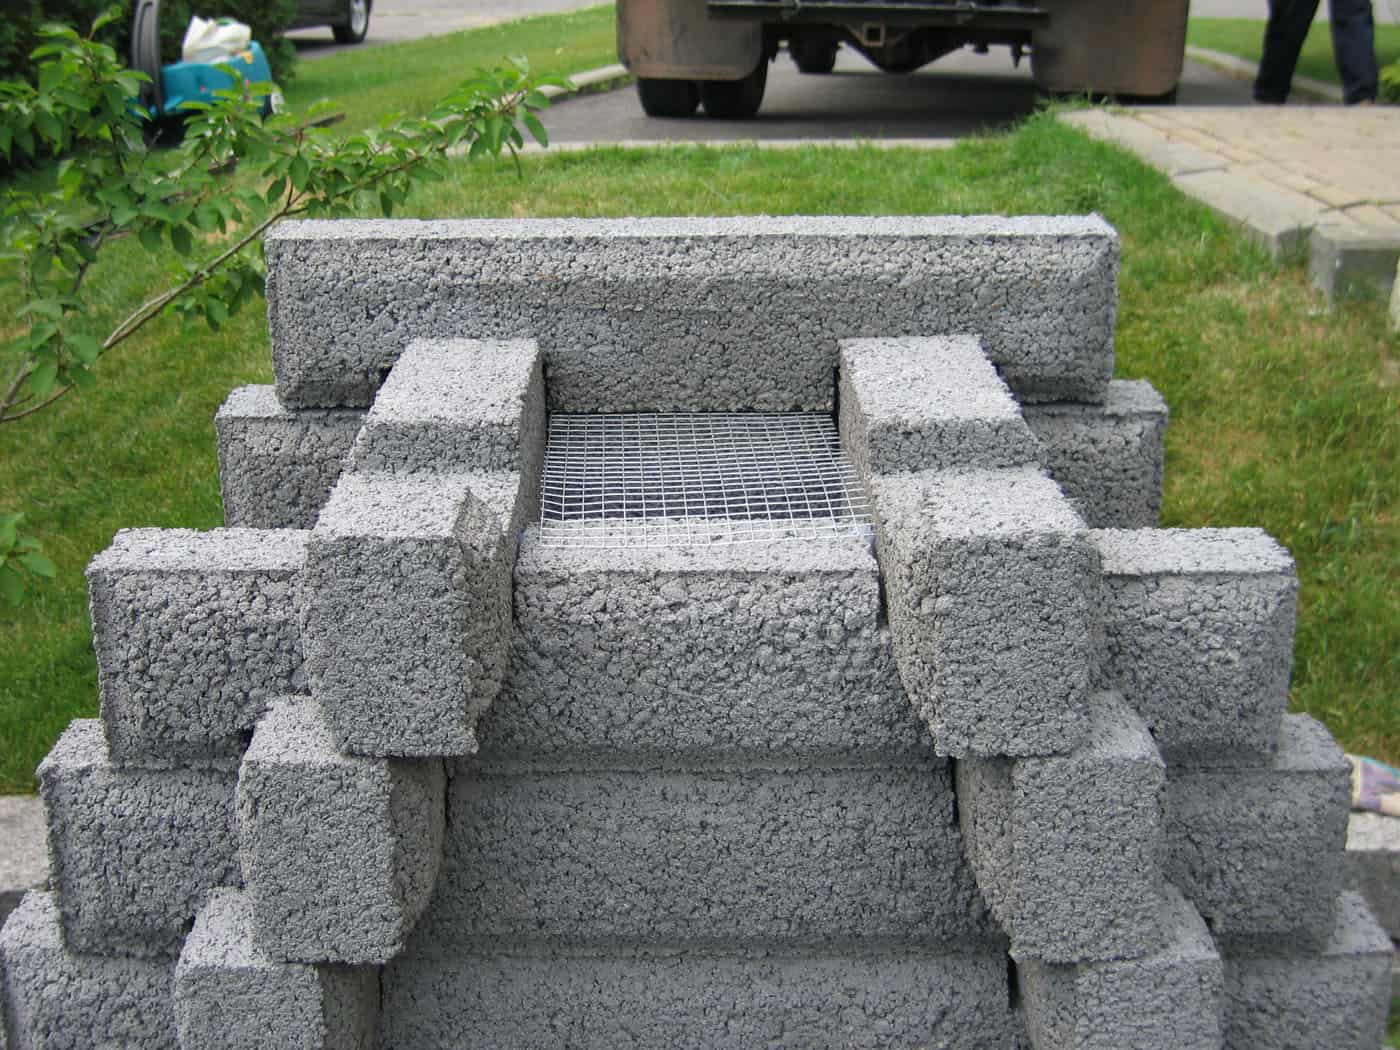
Place at the front of the fireplace the Front Left Arm 36”, the Center 31” and the Front Right Arm 36”. Place at the back of the hearth a 42” (4 notches) then place your Back Left and Right Arm 42” in the boxes for wood’s sections. They will support your shelves and, in the hearth, the plate. Tip : Put some silicone under and on the Back Left and Right Arm 42” to prevent
the smoke to come out from there.
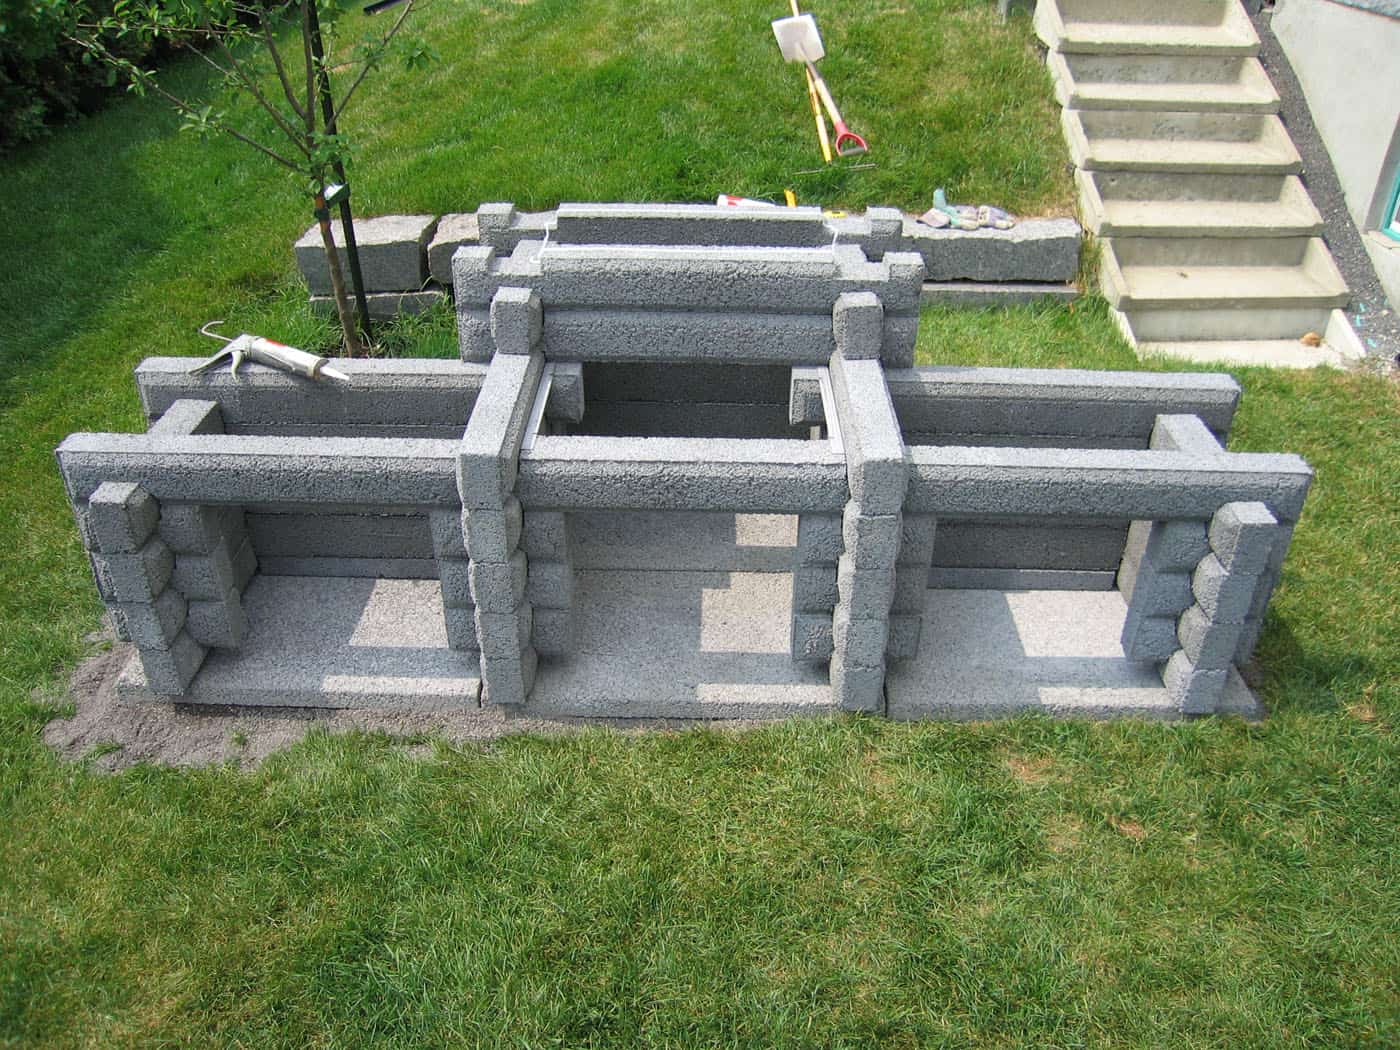
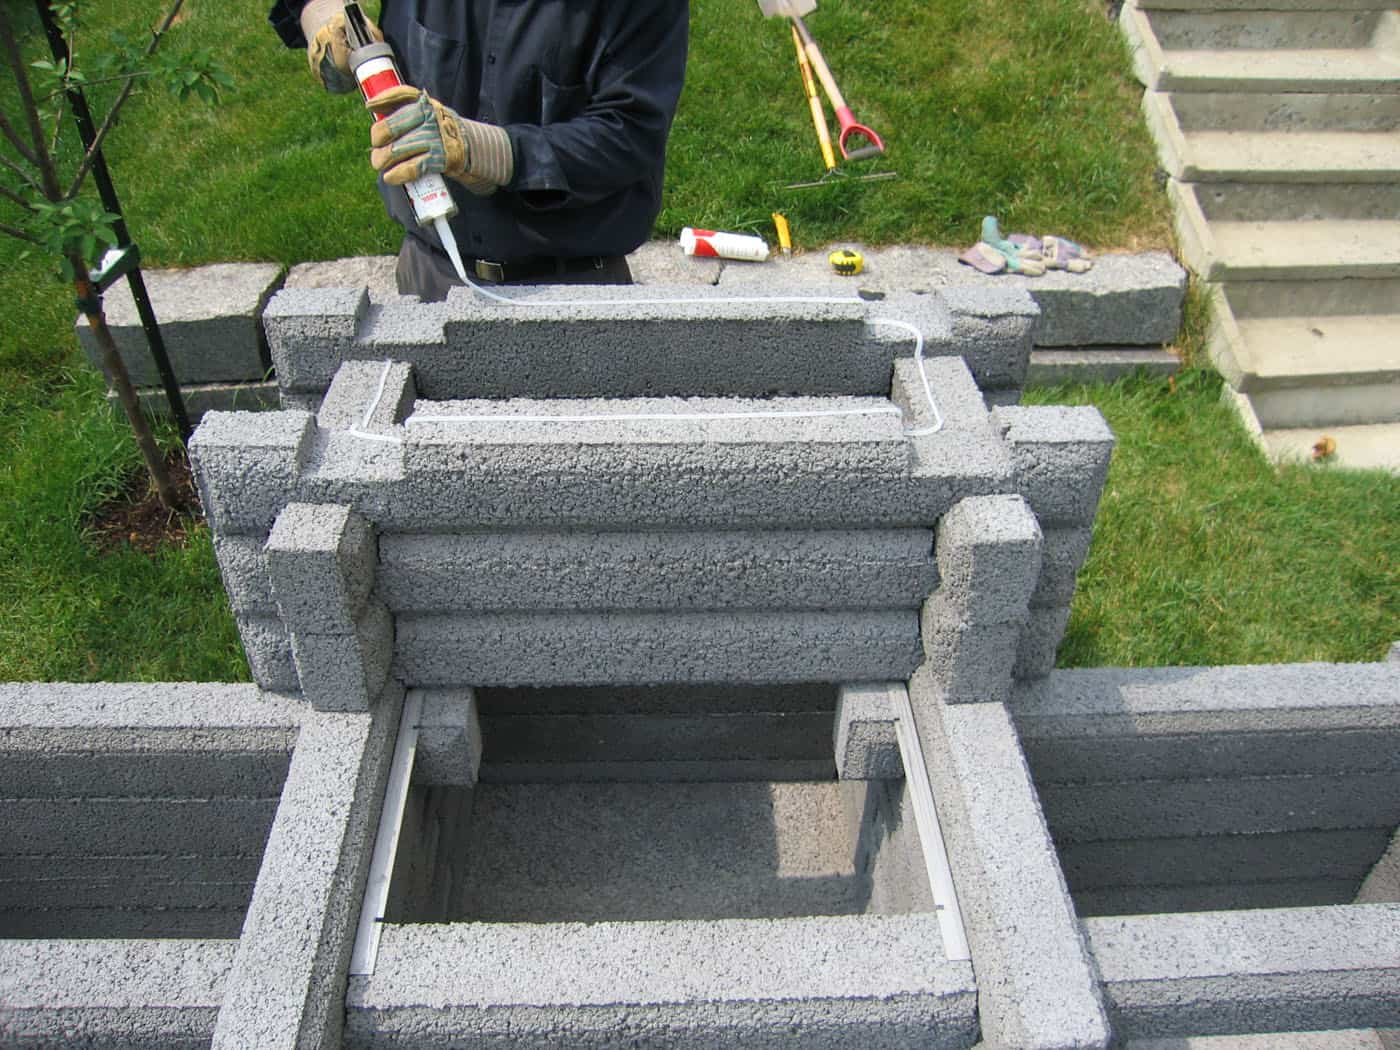
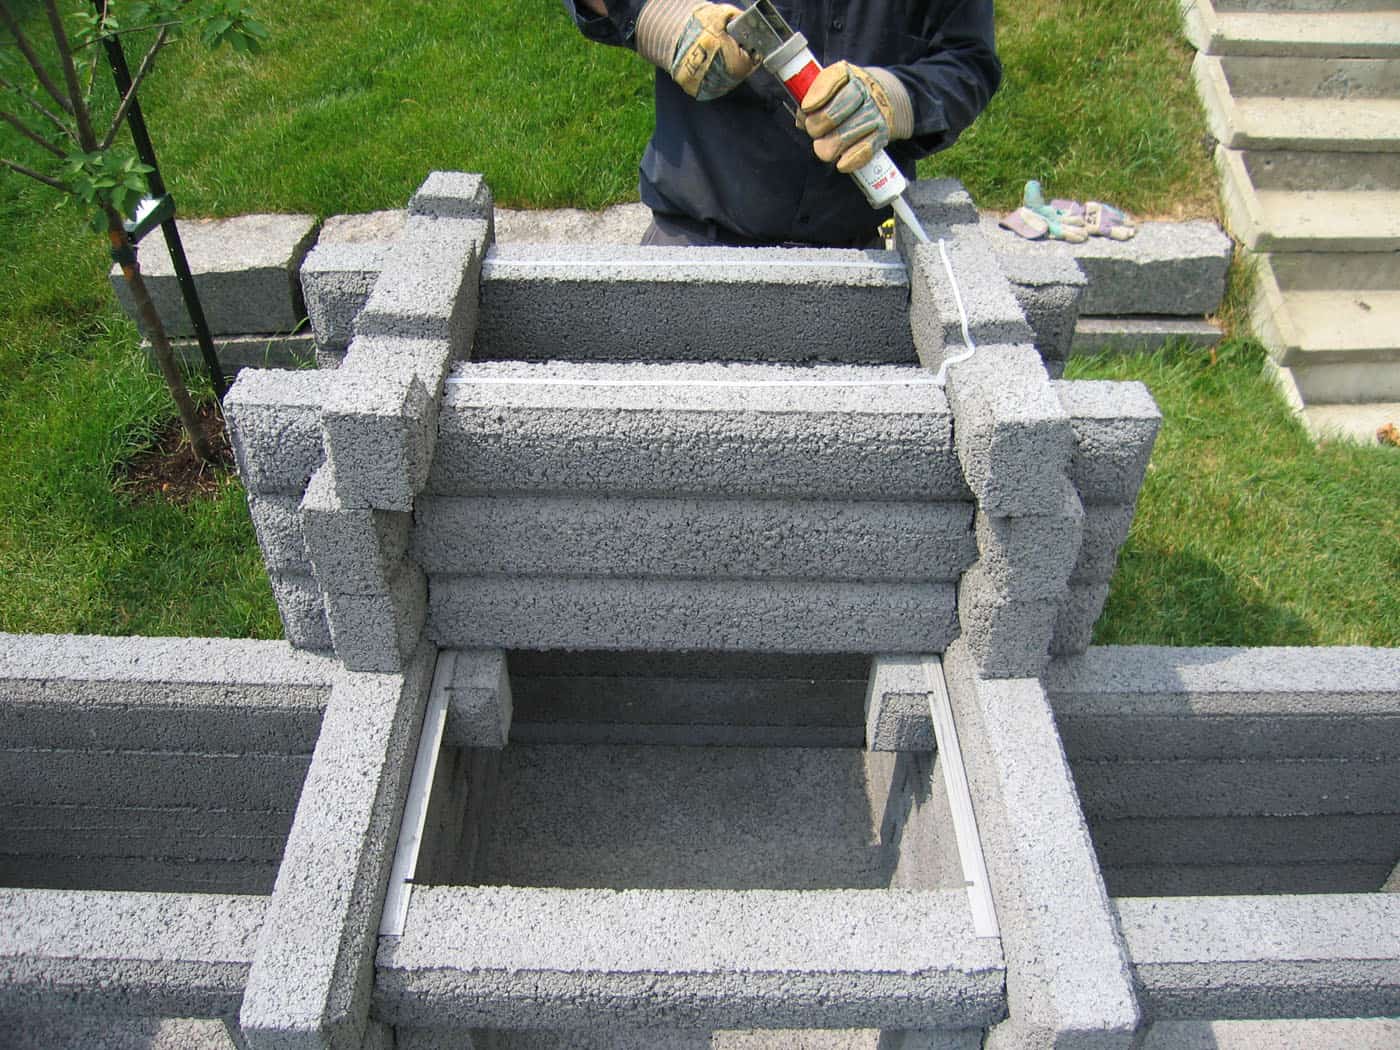
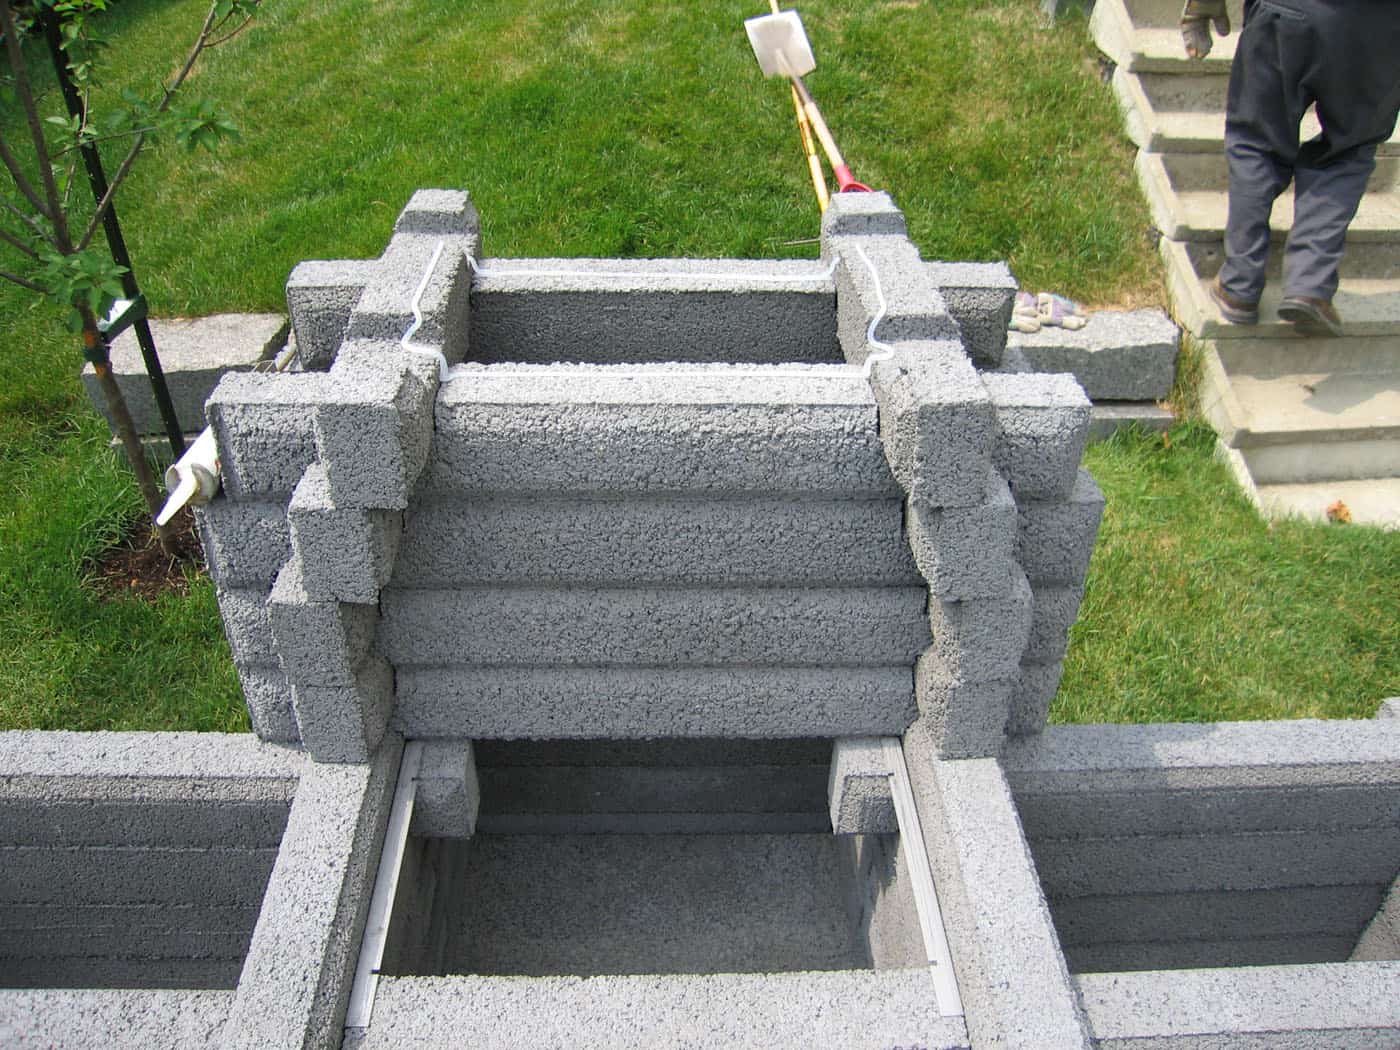
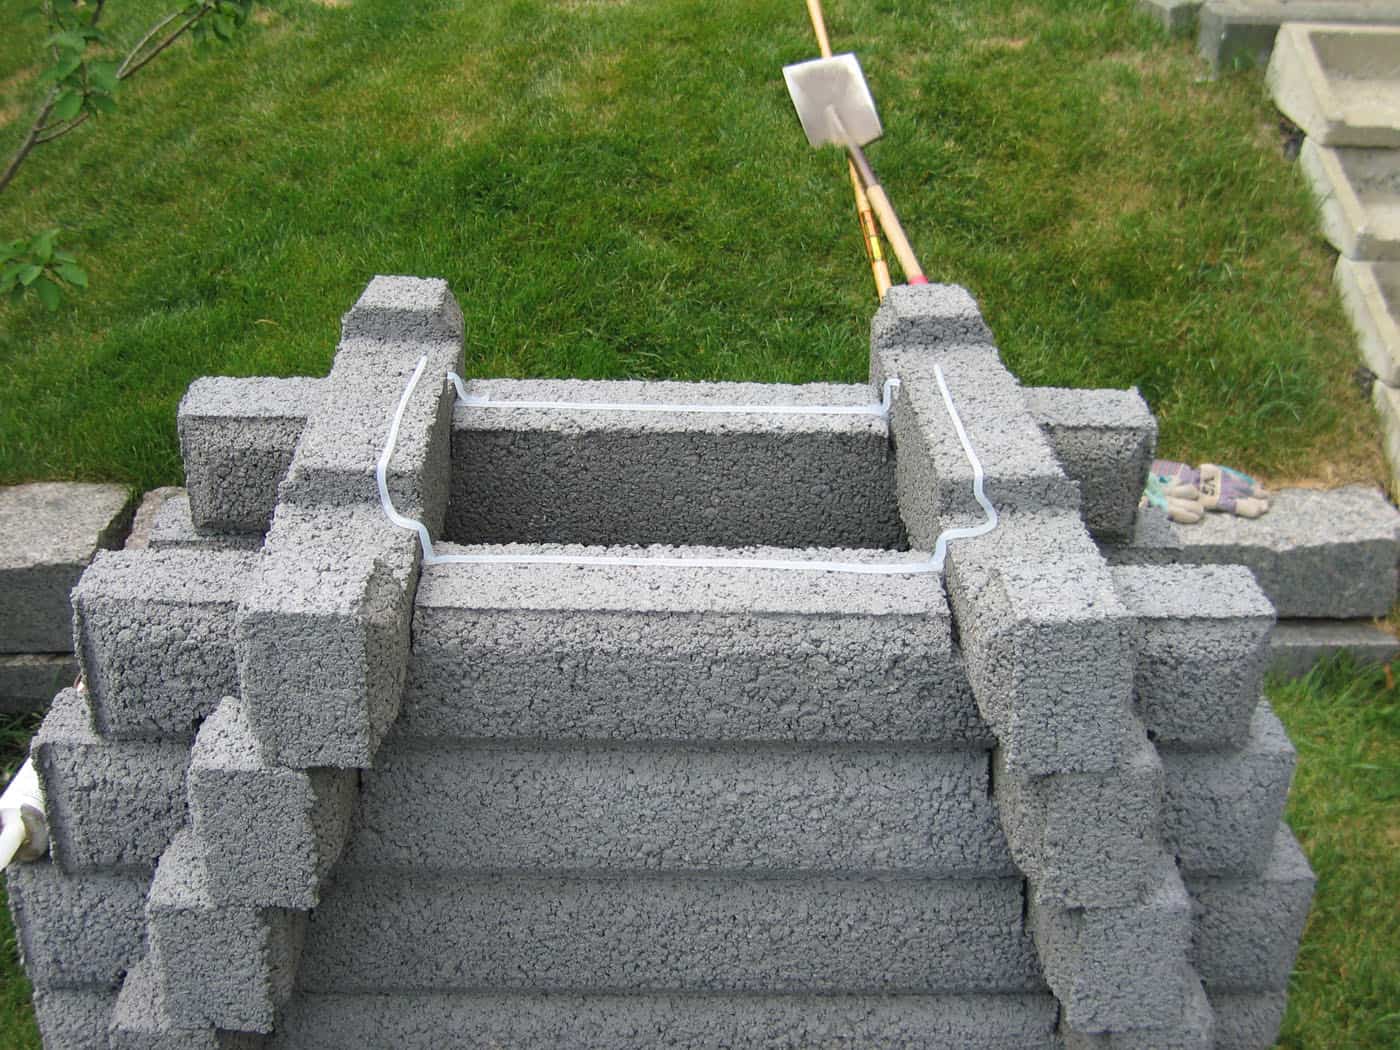
Place your 2 blocks Arm 5 Notches 42” Left and Right. Put in place your slides so that you can remove them at any time. From here you can start putting a thin fillet of silicone (1/4 inch) in the chimney section.
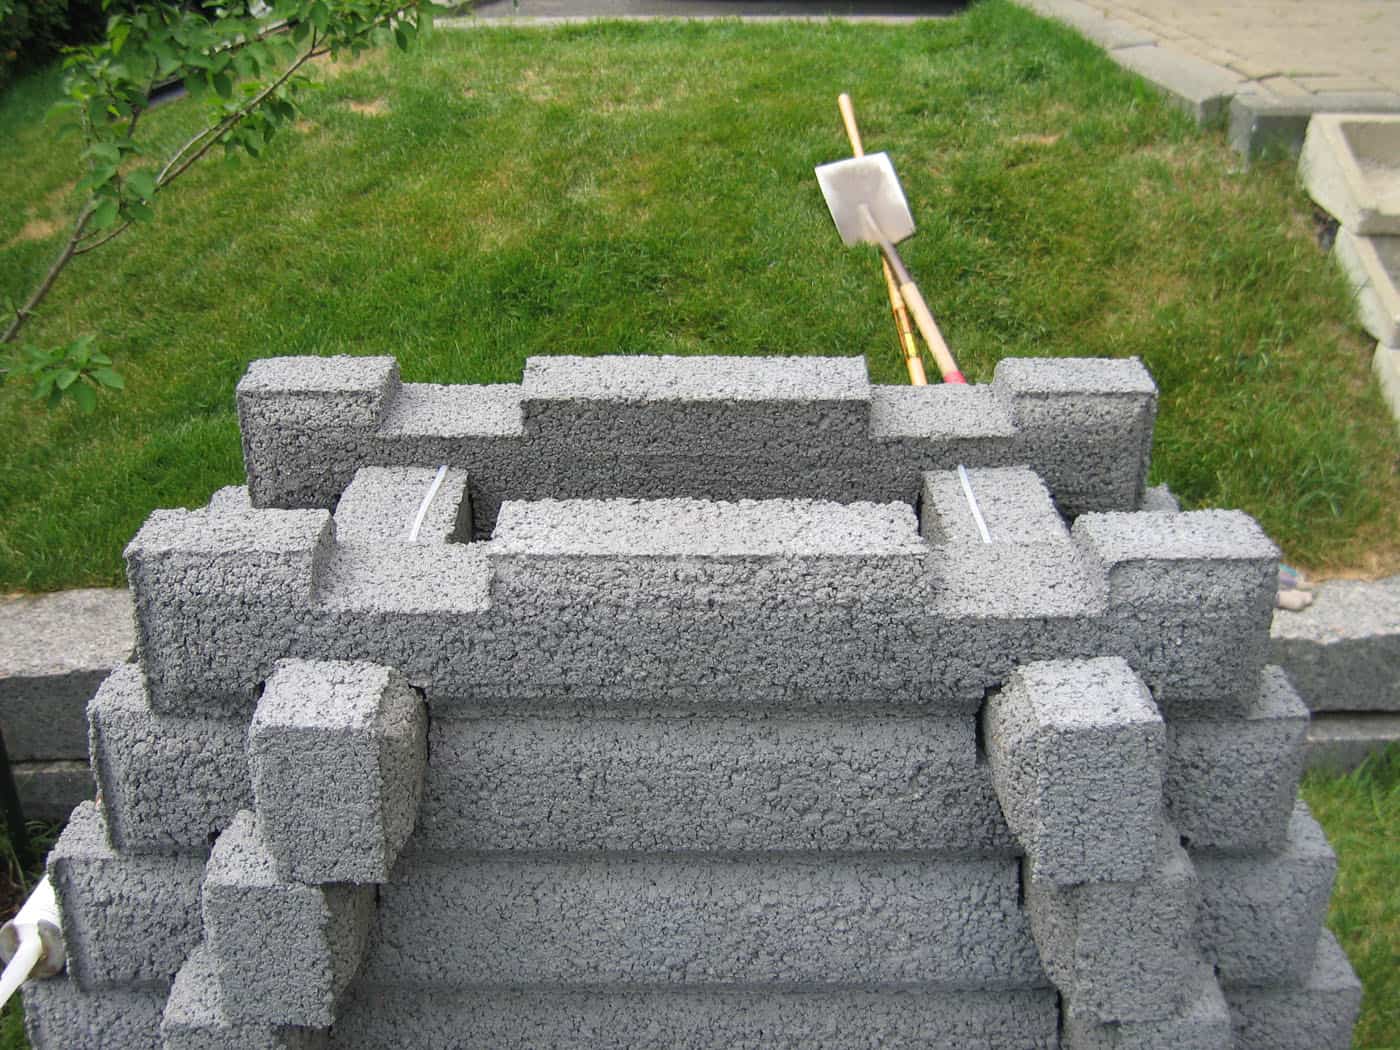
Place the 2 blocks 42” (4 in line notches) at the front and the back of the chimney section.
Place 2 blocks of 24” on each side of the chimney. At this stage, you can try your plate. You will find out if your new outdoor fireplace is square. It is still time to move it a little!
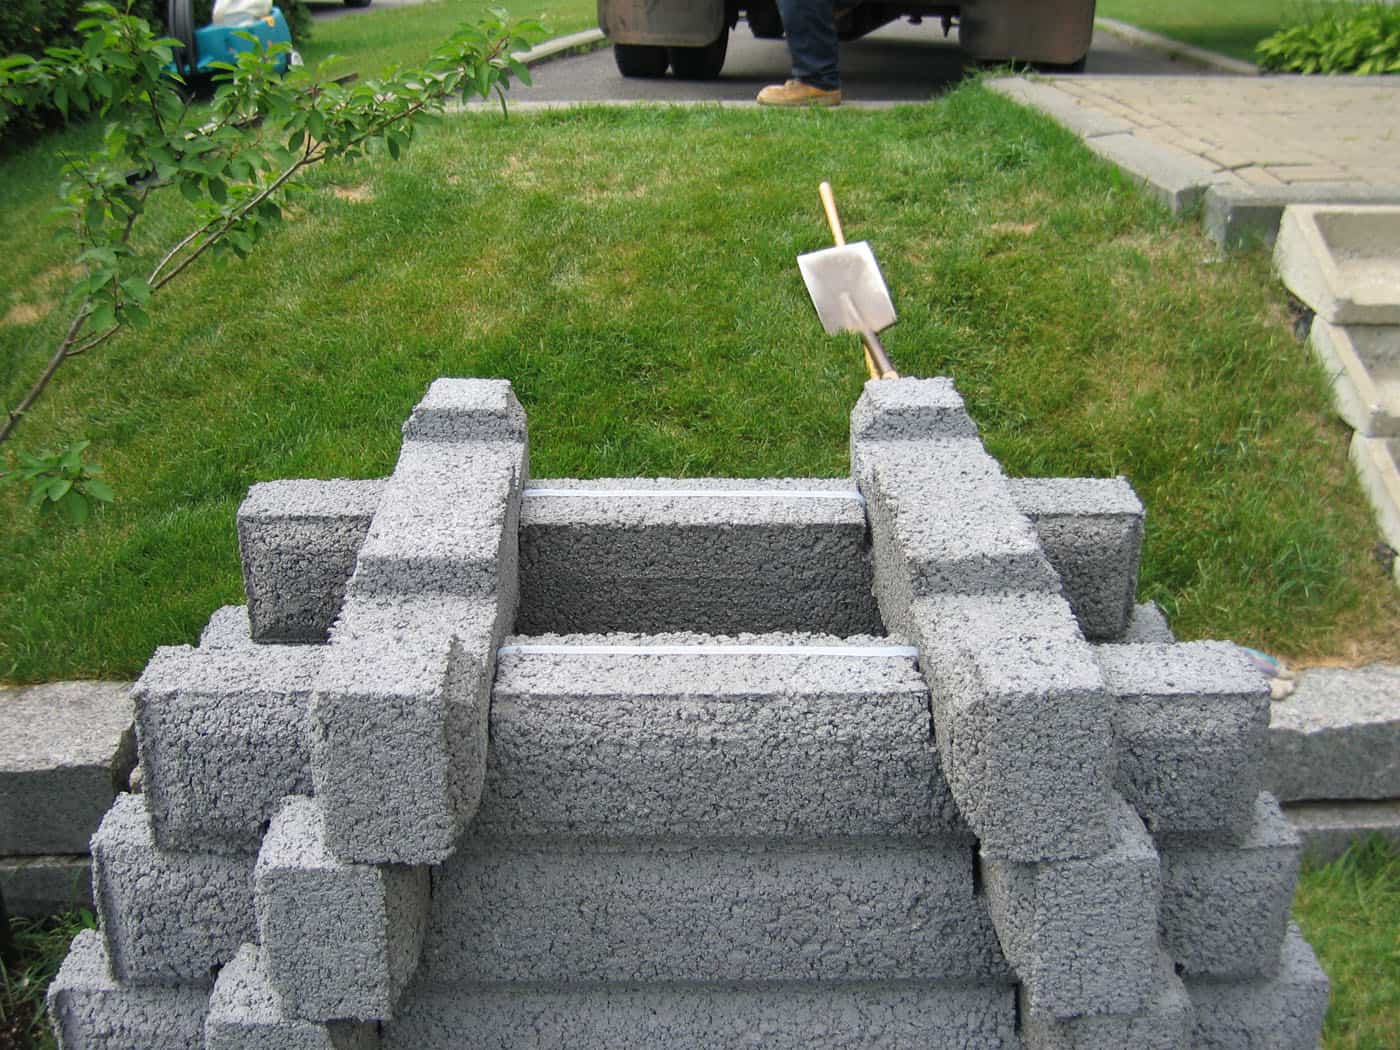
Place the 2 blocks 42” (4 in line notches).
Place 2 blocks of 24”. As the chimney will decrease, put the silicone closer to the inside. This way it will not be visible from the outside when you will put the next stone.
Place the 2 blocks Chimney 42” (4 off-center notches).
Place 2 blocks of 24”.
Place 2 blocks Chimney 38 5/8”.
Place 2 blocks of 24”.
Place the 2 blocks Chimney 35 1/16”.
Place 2 blocks of 24”.
Place the 2 blocks Chimney 31 7/16”.
Place 2 blocks of 24”.
Place the 2 block Chimney 27 7/8”. Reminder : Do not apply silicone in your last row as it is where you will put the spark catcher. Over time it will burn and it will be easier to replace.
Place 2 blocks of 24” and the spark catcher.
Place the 2 blocks Top 24”.
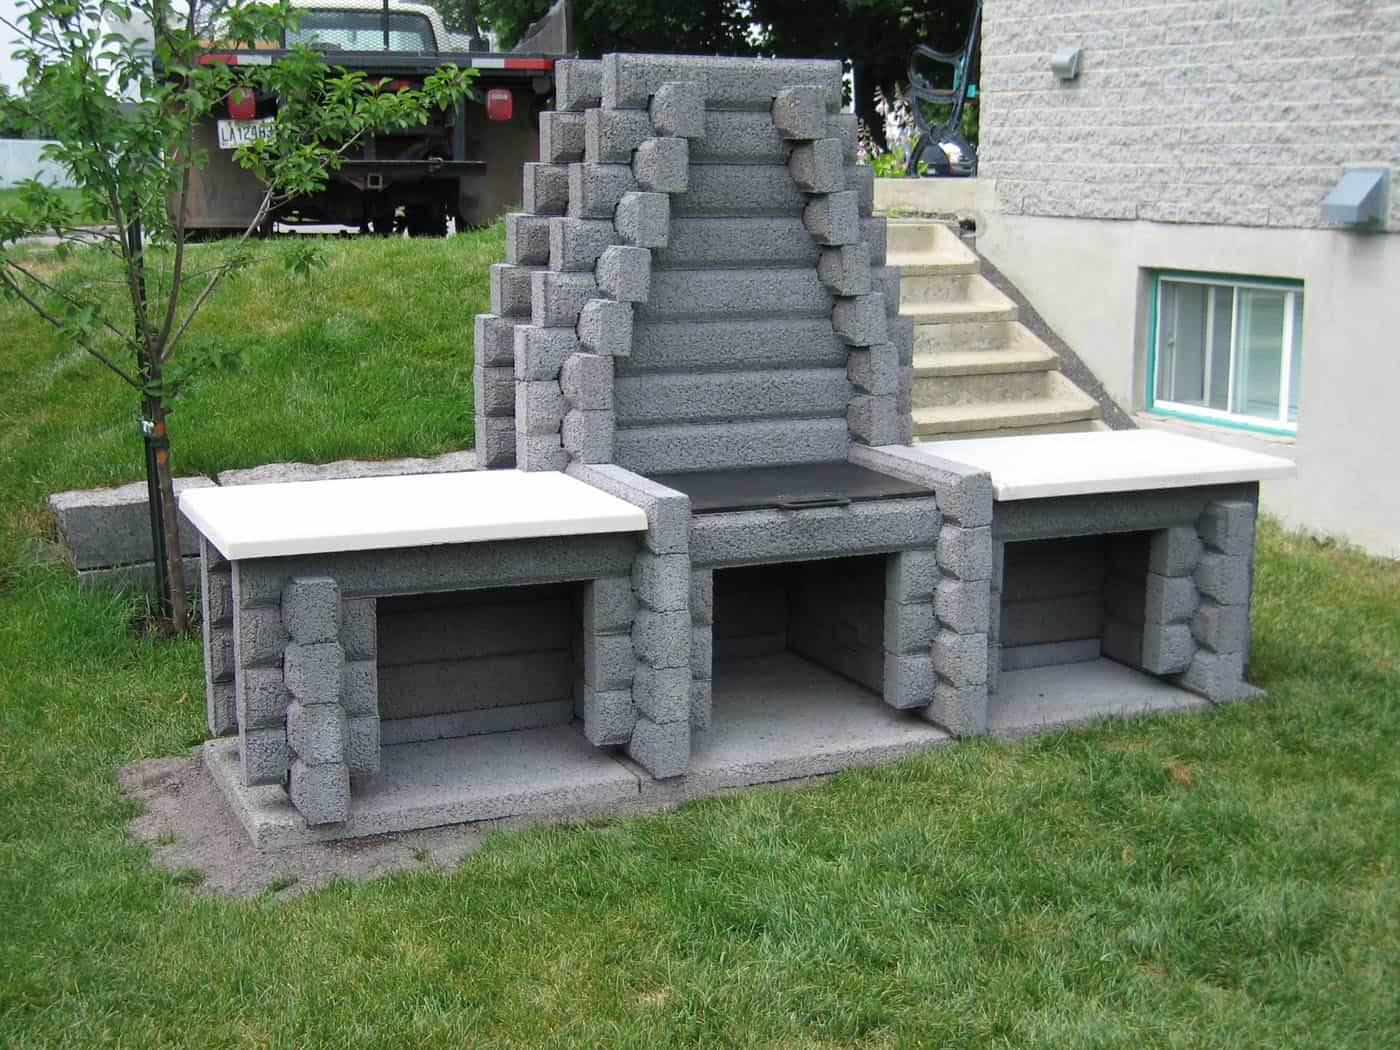
That ends the assembly of your new outdoor fireplace.
What theythink about us.
We bought one of these fireplaces and I now understand the success of Feu Ardent, really the fires are exceptional in this fireplace!
Family business. Outstanding service.
Super well welcomed, they answered all my questions. I highly recommend them.
Best fireplaces to cook outside and make a beautiful fire!
Just good comments on your fireplaces.
Simply WOW!
Scroll to Top
Update
Due to the very high demand for our models of outdoor fireplace and our production capacity, we are currently forced to produce them only in gray and beige for the moment.